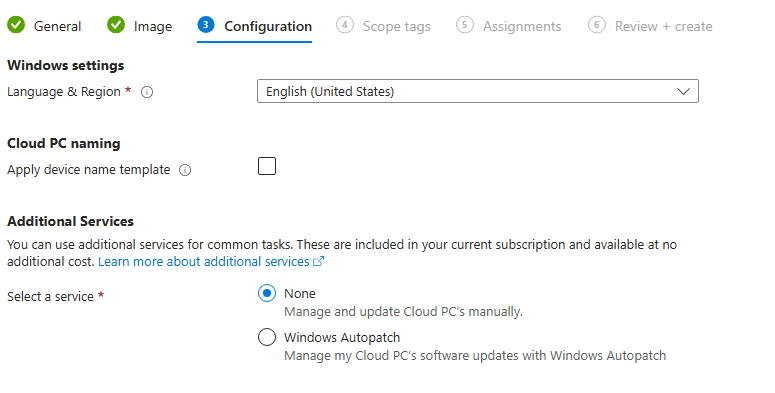
The steps of provisioning Windows 365 Cloud PC under Enterprise License are below.
-select Devices and choose Windows 365

-then select provisioning policy and choose create policy
 -on General Tab, click next once done
Name: Name of your policy
License Type: Enterprise
Join Type: Select Azure AD Join or Hybrid (for this Hybrid Join is if you have hybrid set up Local Active directory) You can just select Azure AD Join
Network: Choose Microsoft Hosted Network (Azure Network Connection is if you are using Hybrid Join devices)
Geography: Choose your county where you Windows Cloud PC datacenter
Region: Choose the region you want your Windows Cloud PC resides within the geography selected (Recommended is Automatic)
Single Sign On: choose this if you wanted SSO
 -under image, select the OS you want to use on your Windows CPC. Then next
 -on configuration, select the language and just keep all as is then next. Or you can check the Cloud PC naming and create your own naming convention for all cpc that will be deployed under this policy
 -on scoping tags, keep it as is and click next
-on the assignment tab, select the Security Group you have created. Then click next
 -then review and if all are good select create
After creating the policy, remove the license you assigned to the user (make sure the user is a member of the security group).
Wait for 15 minutes, then re assign the license again.
Wait until provisioning is finished. Then try now to connect to Windows 365 Cloud PC.
Was this article helpful?
That’s Great!
Thank you for your feedback
Sorry! We couldn't be helpful
Thank you for your feedback
Feedback sent
We appreciate your effort and will try to fix the article